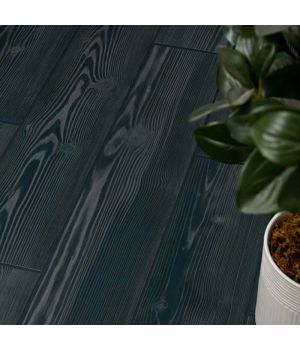
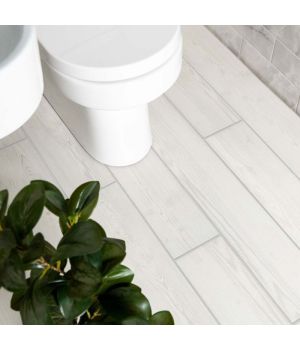
Herringbone Floor Tiles

Shop By
Shopping Options
Category
Colour

Herringbone Tiling Patterns

This page features floor tiles and planks designed specifically for herringbone layouts, creating a classic V-shaped zigzag pattern across kitchens, bathrooms, hallways and living areas.

Herringbone works particularly well with wood-effect planks and slim rectangular tiles, giving floors the character of traditional parquet with the durability and low maintenance of porcelain.

The pattern adds a sense of movement to any room, makes narrower spaces feel wider and holds its appeal across both period and contemporary interiors. Order free samples, spread the cost with 0% finance and explore our full herringbone tiles range to find the right format and finish for your floor.

How Herringbone Works and Which Tiles Suit It Best

Herringbone sets rectangular tiles at 45-degree angles in alternating directions, forming a continuous zigzag. The result adds depth and movement to a floor that a straight grid simply cannot replicate.

Shorter planks give a traditional parquet character that suits period kitchens and hallways. Longer, narrower planks read as more contemporary and pair naturally with wood-effect and stone-effect finishes in open-plan spaces.

Contrasting grout – dark grout between pale tiles, for example – makes the zigzag pattern bold and graphic. A tone-on-tone approach using a grout close to the tile colour creates a calmer, more textural result.

Run herringbone through a long hallway and it draws the eye along the space. Carry the same pattern into an open-plan kitchen and living area and the floor becomes the consistent thread that ties the whole scheme together.

  • Single-colour herringbone: An all-white or all-grey herringbone floor lets the pattern do the work. The zigzag itself provides enough visual interest without any tonal contrast between tiles.
  • Border strips: Frame a herringbone floor with a straight-laid border tile in a contrasting colour to give the pattern a defined edge, particularly effective in entrance halls and bathroom floors.
  • Running the pattern lengthways: In a narrow hallway or galley kitchen, laying the herringbone so the Vs point down the length of the room exaggerates the sense of depth and draws the eye forward.
  • Running across a room: In a wider space or square room, running the pattern across the width rather than the length creates a broader, more settled feel underfoot.
  • Matt vs subtle sheen: Matt finishes suit bathrooms and busy kitchens where grip and practicality come first. A subtle semi-polished finish on a wood-effect plank adds warmth and light reflection in living rooms.
  • Two-tone herringbone: Alternating between two complementary tile tones – a warm grey and a pale stone, for instance – gives the floor a more complex, layered character that still reads as cohesive from a distance.

Where to Use Herringbone Floor Tiles – By Room and Finish

Wood-effect herringbone planks suit living rooms, hallways and open-plan kitchens best. They bring the warmth and familiarity of parquet while handling spills, pet claws and underfloor heating without any of the vulnerability of real timber.

In bathrooms and en suites, stone-effect or neutral herringbone tiles in a matt finish sit well alongside simple wall tiles and minimal sanitaryware. Choose a slip-rated option and keep grout joints consistent for a clean result.

Long hallways are one of the most effective settings for herringbone. The pattern creates directional movement that makes even a plain corridor feel considered and well-designed from the moment you step inside.

Herringbone can be used to define zones in open-plan spaces. A herringbone section around a kitchen island or within a seating nook separates the area from adjacent grid-laid or plank-laid floors without needing a physical divider.

Whatever the room, a sound and level subfloor matters more with herringbone than with a standard grid layout. Any unevenness in the base becomes far more visible once diagonal joints are introduced across the whole floor.

  • Run towards a focal point: Point the Vs of the herringbone pattern toward a fireplace, kitchen island or window to draw the eye to the room's natural centre. It's a simple planning decision that makes the layout feel deliberate.
  • Thresholds between patterns: Where herringbone meets a grid-laid or plank floor in an adjoining room, use a metal threshold strip or a row of square tiles as a clean visual stop. This prevents the two patterns from competing at the junction.
  • Slip resistance in bathrooms: Check the R-rating of any tile before laying it in a wet room or shower area. Matt porcelain tiles with an R10 or R11 rating are the safe choice for areas where standing water is routine. Read our guide on getting the right bathroom tile for further advice on finish and slip ratings.
  • Zoning in open-plan spaces: Use herringbone across a kitchen-diner and switch to straight-laid tiles in the living section. The pattern change alone acts as a zone marker without the need for rugs, steps or level changes.
  • Consistent grout throughout: If herringbone runs through more than one room or across an open-plan floor, use the same grout colour throughout. Changing grout between areas breaks the continuity the pattern is designed to create.
  • Smaller rooms benefit most: In compact bathrooms, cloakrooms and square hallways, herringbone adds far more visual interest than the same tile laid in a straight grid. The diagonal lines also make the room appear slightly larger than it is.

Herringbone Tiles vs Straight-Laid Tiles vs Real Parquet – What's the Difference?

Buyers often weigh up herringbone floor tiles against a standard straight-laid tiled floor or traditional wood parquet before making a final decision.

Option Best for Key benefit
Herringbone floor tiles Hallways, kitchens, bathrooms and open-plan areas Classic pattern with full tile durability and easy cleaning
Straight-laid floor tiles (grid or brick bond) Large open-plan floors and rooms needing a clean, quiet base Faster to lay, lower labour cost and fewer cut tiles needed
Real wood parquet flooring Formal living rooms and low-moisture traditional interiors Authentic timber warmth and character that ages naturally over time

How Much Do Herringbone Floor Tiles Cost? UK Price Guide

Wood-effect LVT planks such as Lumber Honey and Lumber Silver Grey sit at around £24.97 per m², while porcelain tiles suitable for herringbone floors typically range from £18 to £30 per m² depending on finish and format. Premium or designer herringbone options can reach £30 to £40 or more per m².

Herringbone significantly increases installation time and labour cost compared with a straight grid or brick-bond layout. The additional cutting, angle-checking and pattern centring involved can push fitting costs up by around 50% above a standard tile installation, so factor this into your total budget from the outset.

Allow 10–15% extra tiles on top of your measured floor area for cuts, the pattern border and any breakages. Add in adhesive, flexible grout, any levelling compound, threshold trims, and underfloor heating materials where relevant. Getting professional advice on subfloor preparation before laying will save time and money later.

Price band Approx. price per m² Best suited to
Entry-level porcelain planks From around £18 per m² Standard wood-effect or stone-effect porcelain in popular grey and beige tones
Mid-range porcelain and LVT £24–£30 per m² Lumber Honey, Lumber Silver Grey LVT and quality wood-effect porcelain planks
Premium porcelain and designer options £30–£40+ per m² Higher-specification finishes and larger-format planks for statement floors

Herringbone Floor Tiles – Frequently Asked Questions

Are herringbone floor tiles harder to fit than straight-laid tiles?

Yes. The diagonal angles, additional cuts and need for precise pattern centring make herringbone more time-consuming than grid or brick-bond layouts. Most tilers charge more for herringbone, so get a labour quote before you start.

Do herringbone patterns work in small rooms?

Very well. The diagonal lines make compact rooms feel larger and more interesting than a standard straight grid. Herringbone is particularly effective in small bathrooms, cloakrooms and square hallways where a plain layout would look flat.

Can herringbone floor tiles be used with underfloor heating?

Yes. Porcelain conducts heat efficiently and works with both wet and electric underfloor heating systems. Use a flexible adhesive and follow your installer's guidance on expansion joints and substrate preparation throughout the heated floor build.

Are herringbone tile floors more expensive to install overall?

Yes, typically around 50% more in labour than a straight-laid equivalent. Factor in extra tiles for cuts, flexible adhesive, grout and subfloor levelling. The visual payoff is significant, but budget for the full installation cost from the start.

Which tiles work best for a herringbone floor?

Slim rectangular planks work best. Wood-effect porcelain planks in a 15×60 or 20×120cm format are the most popular choice. Stone-effect and plain porcelain rectangles also work well. Avoid square tiles – they lose the zigzag effect entirely.

Related Guides and Categories

Browse all herringbone tiles in the full range, or read our practical guides on how to install porcelain floor tiles, installation costs for tiles and the wood effect tiles vs natural wood floors comparison before making your final decision.

Spread The Cost With 0% Finance Easily With Klarna & ClearPay