Cookie
This website requires cookies to provide all of its features. For more information on what data is contained in the cookies, please see our Privacy Policy page. To accept cookies from this site, please click the Accept button below.
DISCLAIMER - This is a guide only and Tilesporcelain Ltd is not liable for the finished tiling project.
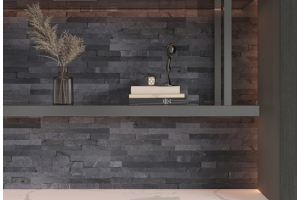
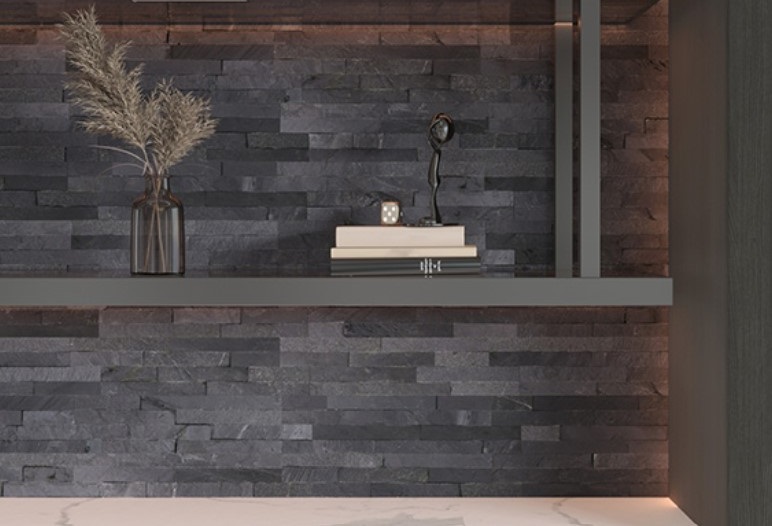
Stone cladding or stone veneer as it is sometimes known, provides a decorative although non-structural stone finish to interior and exterior walls. Stone and brick veneers can be made from reconstituted or art stone while the best cladding is usually prepared from slices of dressed natural stone. Application techniques vary depending upon the type of surface and can be suitable for application over plasterboard or external brickwork providing the substrate is prepared thoroughly to handle the additional weight. Often the cladding comes as individual coarse blocks although some products have tightly spaced stone “blocks” fitted together that help create a dry-stone effect are applied without mortar joints between blocks. Stone Cladding has become quite popular for interior decoration of chimney breasts and helps create a feature wall mimicking building stone.
Prepare a diagram of the walls to be clad and measure the overall area. Deduct the area of doorways and window openings. If you are creating a stone facing that extends round corners slightly don’t forget to account for the additional area. Once you have the area of stone calculated; allow at least an additional 10% for wastage when cutting.
While it is possible to apply cladding directly onto a keyed brick or stone surface; a more reliable solution for a DIY project that will remain structurally sound for the envisaged lifetime of the installation will probably involve fitting a metal lath substrate. External surfaces should be covered with a suitable weather resistant film or vapour barrier. Ensure any sheet products overlap by at least 100 to 150mm to help prevent moisture tracking by capillary action.
Once a vapour barrier has been installed on external walls; internal and external applications are very similar. Fit a corrosion resistant metal lath with suitable fixings every 150mm. This is then covered in a scratch coat comprising a coarse sand-cement mixture with 2 parts washed sand to 1 part masonry cement using a trowel application. The surface is scratched with a metal scraper to provide a coarse finish that will provide a suitable key when the cladding is applied. Ensure when preparing the scratch coat render not to add too much water. The approximate consistency of mashed potato is about right. The finished thickness of render will be 12 to 18mm. Allow the mixture to dry and partially cure for 24 hours before fixing the veneer/cladding using a suitable mortar mix.
Prepare the mortar according to manufacturer’s instructions. A ready mixed polymerised mortar is often used for cladding applications. This material comes ready prepared and just needs mixing with water. A standard 2 to 2.5: 1 sand cement mix could also be used.
Work out a pattern for the cladding and have materials to hand. If any veneer blocks need trimming then make sure to have a suitable abrasive wheel/grinder to hand to help with the accurate trimming off the blocks. If you want a more rustic look then cut a groove in the blocks from the back face, part way, then break the block with a masonry or brick hammer for a coarse, rustic exposed outer edge. For a neater finish, you should work from the outer edge towards the middle and from the base of the wall upwards. Try and arrange the blocks to create a consistent colour and pattern with whole blocks on the outer edge for improved strength. This is important as structural integrity relies mostly on the adhesion to the scratch coat rather than the natural fitting together of blocks or bricks, after all these are thin veneers rather than full thickness blocks.
It is important to remove any loose dirt by washing the stone dirt-free. The stone can then be patted dry before use. Contamination can severely affect the ability of the veneer to stick to the mortar. You don’t need to soak the blocks but the surface cleaning helps prevent “suction” from the block that might dry the mortar too quickly before it has a chance to cure.
Keep a bucket of water to hand in order to clean gloves and tools. Mortar adhering to the surface of the stone can be difficult to remove afterwards and is best avoided with good “housekeeping”.
Apply mortar by buttering the back of the stone block with a layer up to 20mm thick. Make sure there is a slightly thicker ridge at the outer edge. Press the block in place using a wiggling action to ensure the mortar makes full contact between the block and the scratch coat. Repeat the process with each stone in turn. Try to place the blocks with a uniform gap between blocks. A narrow gap may look visually better than a large gap.
You may find a grout bag, similar to a cake piping bag, convenient for piping ready mixed grout into the gaps between randomly sized blocks. Apply the mortar and finish with a suitable tool. Make sure to hide any cut edges. A striking or finishing tool will help provide a consistent finish and has a positive effect on the durability of the finished mortar joint by creating a less porous and hardened outer shell. Use a clean brush to remove any loose mortar as you go. Once dry; set mortar can be extremely difficult to remove without an acid treatment to dissolve the cement matrix.
Long term cleaning and maintenance will be much easier if the surface of the stone blocks is finished with a layer of sealant to help resist water and dirt ingress. The sealant shouldn’t provide a vapour barrier so that the stone can dry normally; it simply resists rain and water splashes. You may need to re-apply sealants every few years to maintain the stain resistant effect.